Moore-based ultra-precision 3D machining
The Moore Machine Tool company - over many decades of work - dedicated themselves to mechanical accuracy. They made many of the secondary mechanical measurement standards used by National Metrology labs around the world.
For their Jig Grinders - essentially 2D machines - they went to significant lengths to generate X,Y,Z axis orthogonality and lead screw precision. Many of our Jig Grinders are 30 Years old - normally you would expect such machine tools would be worn out, but given the forces-less process of jig grinding, the machine's casting are now fully stabilised, and no wear can be detected.
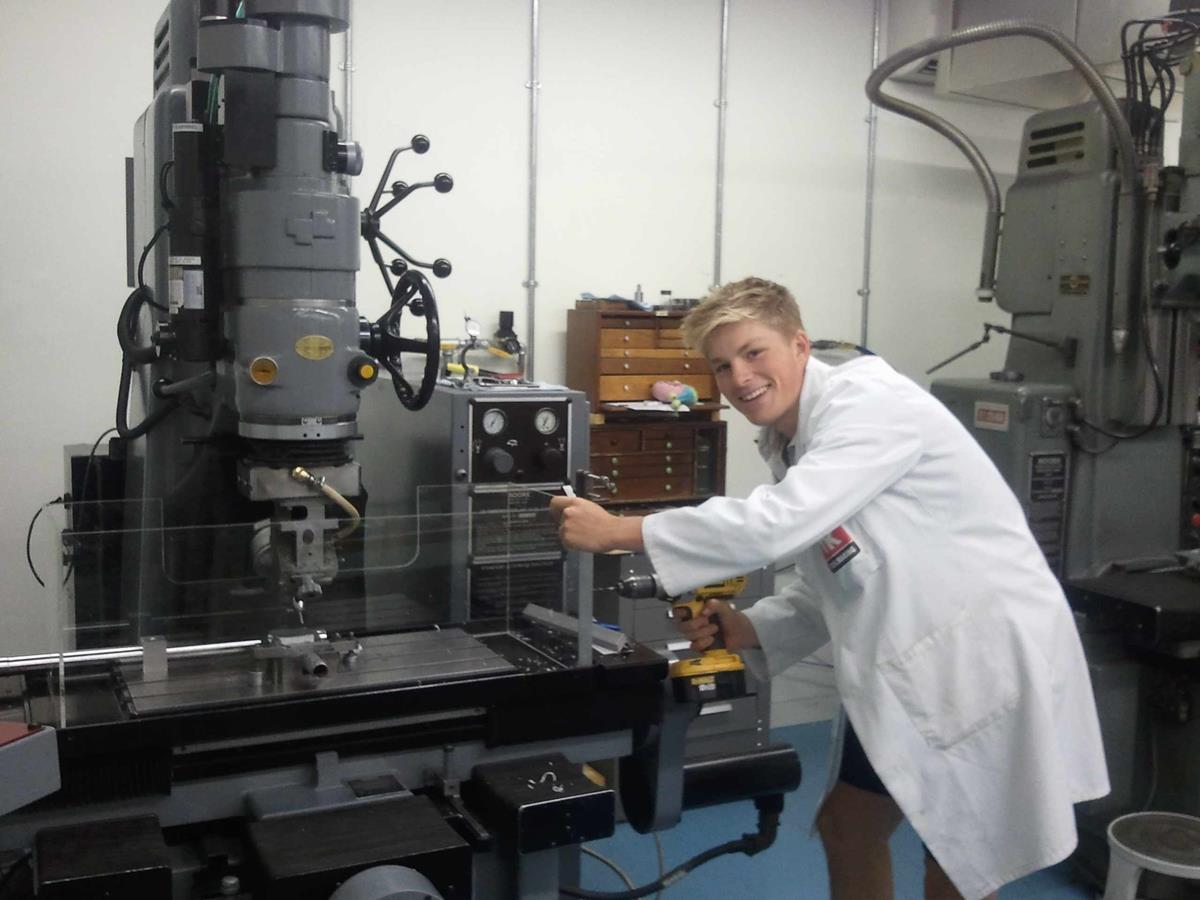
The Moore 8400 machine imaged below was fully rebuilt for us in 2012 by 2 SQ based in Greensburg, Pennsylvania in the US, and an up-to-date Fagor CNC controller added. Full control of the Z-axis was added. The controller is set to resolve down to step sizes of 0.2u.

The rebuilt 8400 Moore machine, with a new chip cover being assembled by a student.
The centre of the machine shows the Air driven head tilted at an angle
We have spend the last year refining the controller's settings and developing CAM software and machining strategies, and the results are now starting to appear. We are centrally interested in the ability to machine small conic-section or aspheric mirrors for use in high frequency Quasi-Optical systems. We do this by machining the surface with an accurately known diameter bull-nose cutter, set at an angle (to avoid zero cutting speed at the surface - this is why the air spun head it tilted over in the image) and spun at 40,000 RPM.
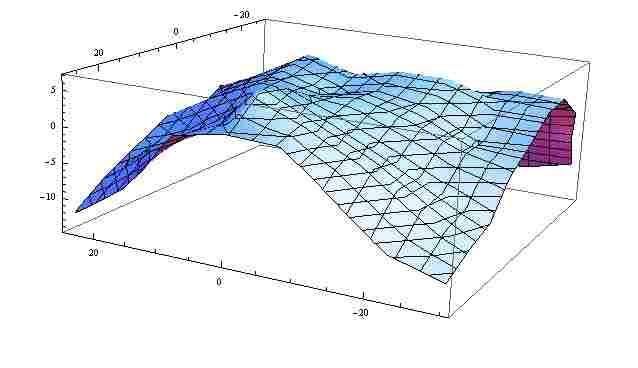
Below are Mathematica results from analysing a CMM measurement on a small ellipsoidal mirror - a design made for a radiometer being built for the IAP in Bern. The RMS surface accuracy is at the 3u level. What is impressive is that there are essentially no tilts or offset needed in fitting - normally we find that we need to apply small offset - angular or positional or changes in nominal ellipsoidal parameters - to achieve this sort of RMS error. This will be particularly important when many mirrors are formed in the same piece of metal, and no relative correcting tilts are possible - such as in push-broom optics for design such as STEAM-R
Snipped of Mathematica code, showing no rotation (Phi), no dowel offsets
and only a minuscule tilt in the X axis and none in the Y to achieve our 3u result

Our work in this area is not finished and our development work to further refine precision will continue.
Surface error - presented at 1000 tiles scale in the Z-axis
